Quart: A New Dress for an Old Maid
The next article in the series covering Quart comes to you from Emily Griffin. Emily is a communications developer, jeweler, mom and general DIY maven. She's also stuck with me for life! You can check out her DIY blog or Etsy store to see more.
Emily is going to cover what went into the aesthetic redesign of what is now the host for my little Raspberry Pi symbiote. I think the result is pretty awesome. Take it away Em.
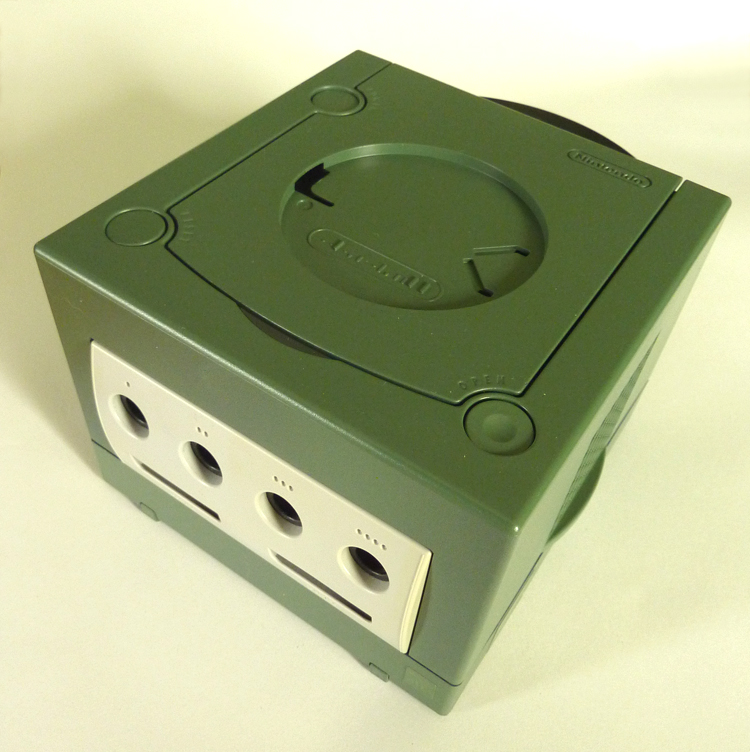
For those of you wondering when Nintendo released a green version of the GameCube - well, they didn't. Thanks to the technological advances of the aerosol paint industry, your GameCube can be any color you like!
We argued whether it's blue or purple. Apparently it's indigo.
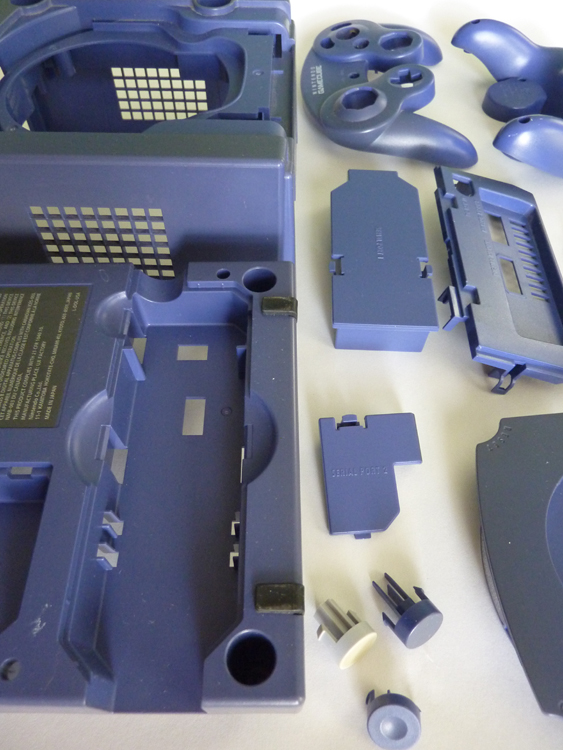
The first step was to break the GameCube down. For full disclosure, I didn't personally do this part, but I was assured that beyond the security bits, it basically fell to pieces. If you're following along at home, don't forget to take off any stickers and residue left behind. I wish I had noticed the AMD sticker on the front of the 'Cube. I gathered all the pieces, including the controller parts - and don't forget the plug end, like we did - and gave them a good wipe-down with TSP.
Before we get too into painting, an option for those of you with lighter-colored cases (white, silver, gray, etc.) may be to dye your parts instead of painting, but keep in mind that the dyes are translucent, and won't work well on darker colors.
After the primer was applied
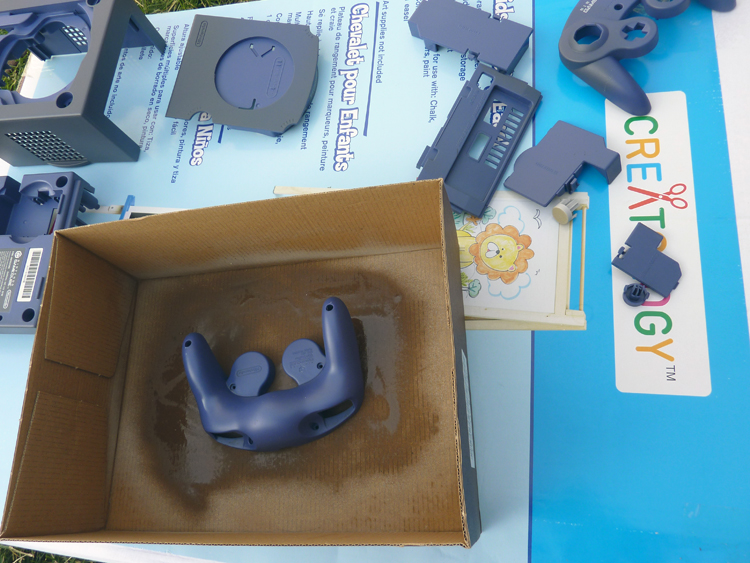
The first product I used was a clear aerosol primer that bonds with plastics made by Valspar. These come in a few colors, too, but none of them were close to what I had in mind. Once primed, you can use any regular spray paint - which opens up a wealth of color and finish options. Two coats of the primer, ten minutes apart, and then an hour of drying time before spray painting. It's worth noting that the primer was basically invisible and didn't change the texture or finish at all.
I followed up with two light coats of spray paint. It's important to keep the can 18" to 24" away from the chassis while spraying if you want to keep the detail (engraved words, textures, etc.) in your finished piece, and to avoid drips.
 Stick the buttons in holes so you can paint the top and sides without touching them. |
 It's...missing something. |
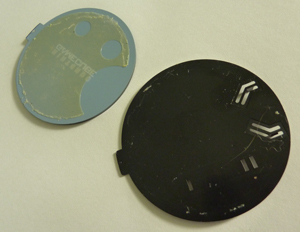 So after everything was dry and reassembled (yeah, I didn't do that part either), we were still left with the GameCube logo on the lid. Well, this is hardly a GameCube anymore, is it? After some careful reverse-engineering (read: cram fingernails in and see if it comes apart) it was discovered that the logo disc is in two pieces, glued together. A flathead jeweler's screwdriver was helpful in prying apart the two halves - but be careful, the pieces are pretty fragile. Go slowly all around the edge.
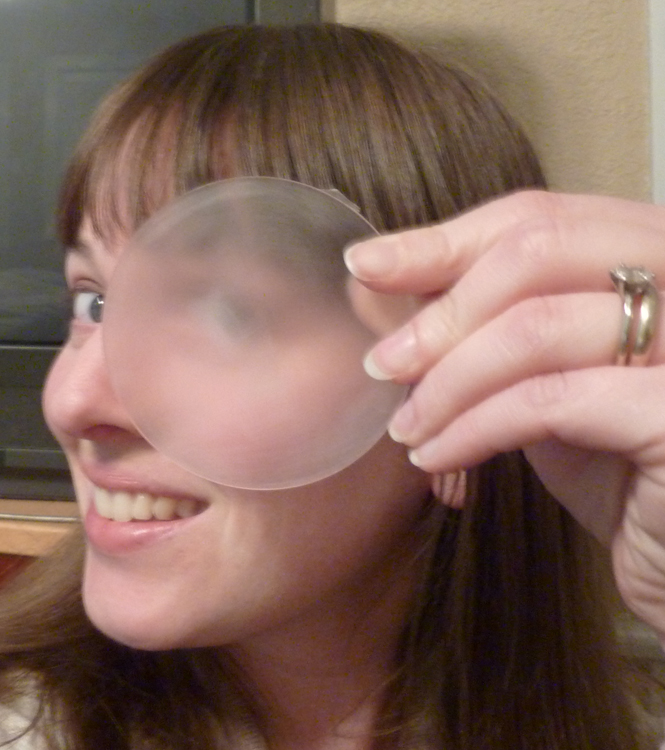
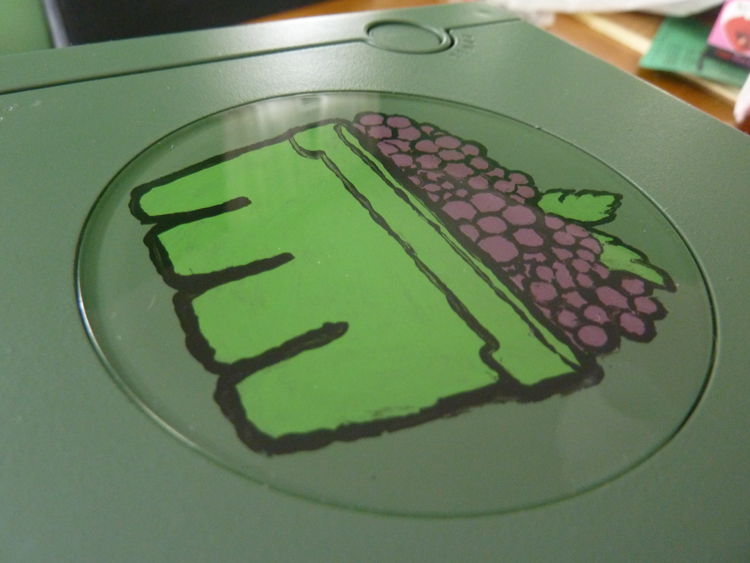
The top half is clear acrylic with the logo painted (printed? decaled?) on the back. The adhesive came off fairly easily with some Goo-Gone and a little scraping and peeling. The logo proved more challenging - I tried a few different cleaners/solvents and a Mr. Clean Magic Eraser before giving up and trying the last-resort sandpaper. While I didn't want to scratch the acrylic, there just didn't seem to be an alternative, so I set up with a 600-grit wet/dry sandpaper, the finest I could find. The sandpaper easily took off the logo and didn't even leave the disc too terribly scratched, but it did look a little cloudy.
I'm always looking for a reason to bust out my Dremel, so I decided to give the acrylic a quick buff with some polishing compound. The disc looked good as new (except where I accidentally chipped off the edge - whoops.)
 This is way easier than airbrushing! |
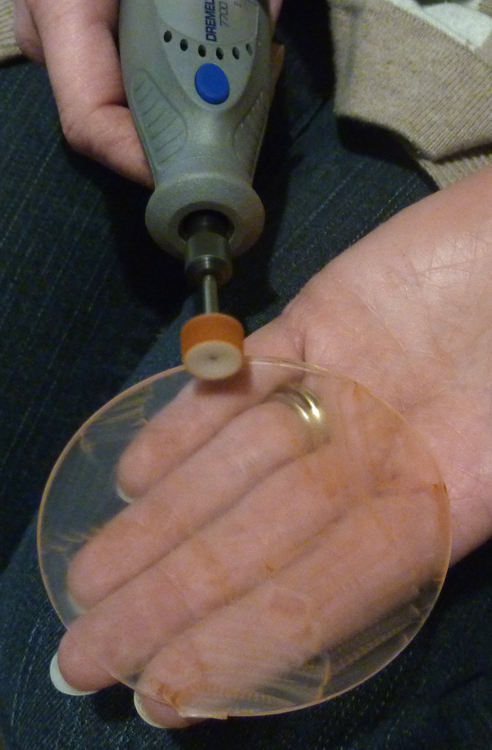 Buffing your skin is not recommended. |

Now, if I wanted to do things the easy way, here is where I would have printed off a copy of the logo and sandwiched it back between the two pieces of the disc. But that's no fun, is it? A unique piece of hardware like this deserves a unique logo - so I decided to hand paint it on the back of the acrylic. (Actually, my printer is out of ink. And I'm cheap.)
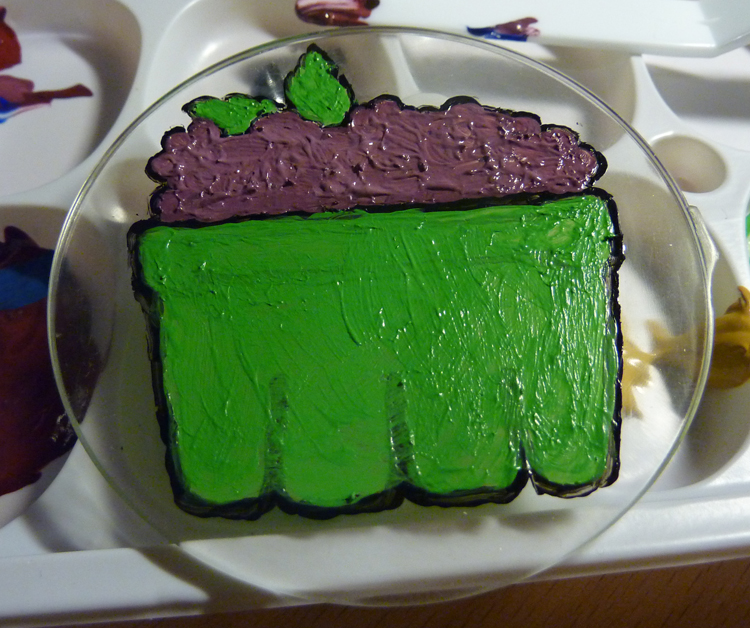
Here's my setup: plastic-wrap covered tablet with the logo at the appropriate size (plugged in, with the screen set to stay on, of course), acrylic paints, teeeeny tiny brush, a wooden skewer, and a table lamp. I reversed the logo on the screen and centered the top disc on the plastic wrap.
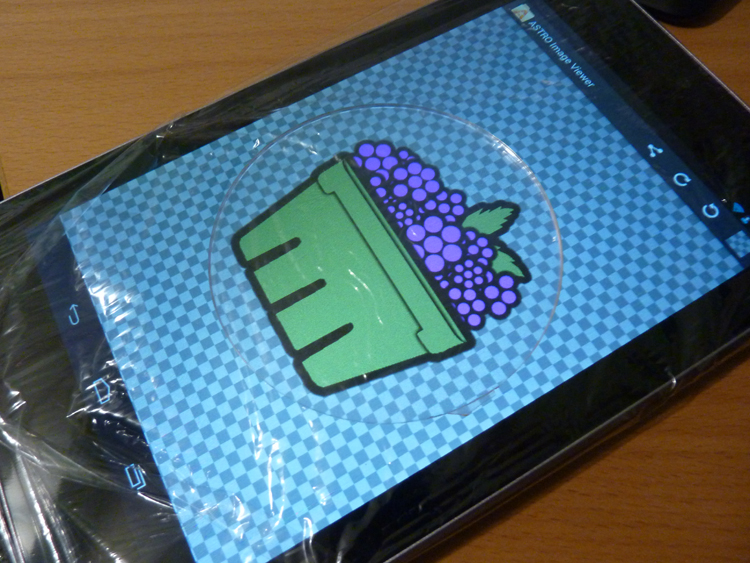
Again, a functioning printer may have been useful here...
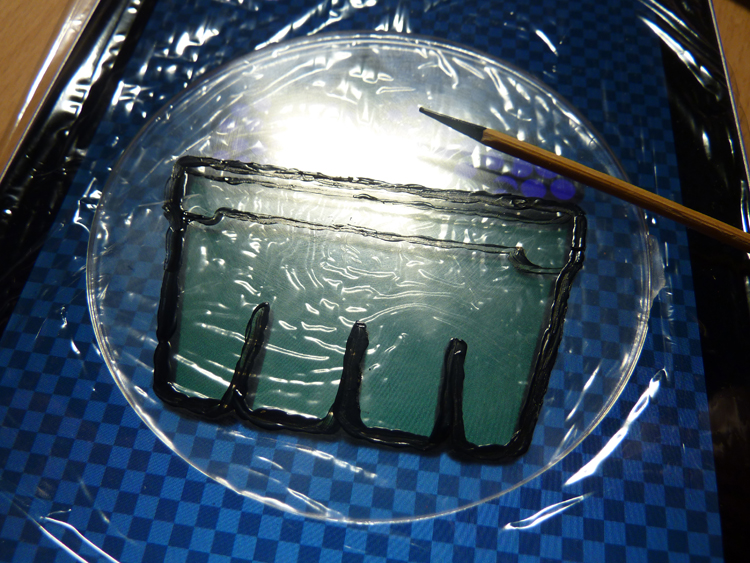
First, I traced the outline - that way, I didn't need to be too careful while I colored. The skewer was useful in scraping and pushing paint if I needed to change the lines a bit.
 |
 |
When the outlines were done, I removed the disc from the tablet and flooded the interior parts with colored paint.
 |
 It occurred to me that using a Sharpie would have been tons easier, and that I was a masochist to make all those tiny berries. |
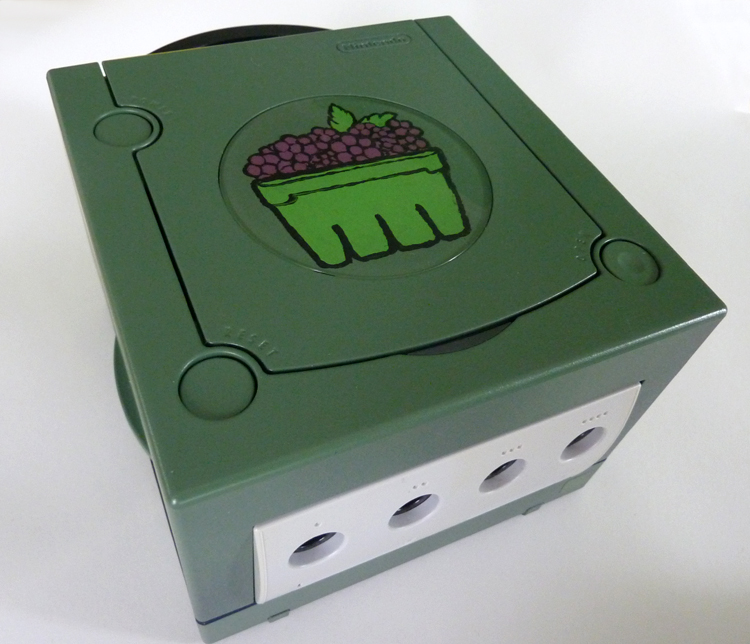
Let dry overnight, hit the back with a quick shot of spray paint, put the discs back together, and voila! Quart's new skin!
 |
 |
Quart: OpenELEC branch commit breakdown
I've been putting off dealing with the documentation of all the snags I've run into thus far and decided to just take a look at the commit log and rationalize each one. Some of these are fairly specific to my situation, while others may have broader implications.
Once the gamecon module was added to the build, this was the first and largest hurdle to jump in getting gamepad input in OpenELEC for Raspberry Pi. Here's the situation:
the gamepad device is simply not utilized, or even logged as enabled, though running evtest shows that it's blocked. The first place you might look for a solution, understanding that you're using Linux window events, is LinuxInputDevices.cpp. Scrolling down and seeing the Linux input device type enumeration confirms the supposition that you are on the right track.
Your supposition, as it turns out, is bad and you should feel bad because the GetInfo method is going to be called to determine what type your little device falls into, and it will do this:
...since the button counting loop stopped at BTN_JOYSTICK (this is the index at witch joystick/gamepad buttons start), num_buttons is 0 and your gamepad is left as LI_DEVICE_NONE. Unfortunately the solution is not just to bump the index limit up on the loop, because there is no codepath in the application loop for CLinuxInputDevice into CButtonTranslator's TranslateJoystickString method.
There are only two paths to TranslateJoystickString in CApplication. One is the event server, the other uses SDL. The latter seemed an easier, cleaner option to me. Theoretically, it would just mean the inclusion of libSDL in the build.
This is from the graphic configuration script in the OpenELEC build system.
We start to see how a problem like this could happen, because right now it's relegated to users running XBMC in Linux without X, who require joystick support sans event server. One could make an argument of course that you can use SDL input without the rest, which is what I did.
The solution was mostly just changing a few variables. I commented out the lines above and changed some defines in system.h. The only real functional issue was that after XBMC's CLinuxInputDevice assigns LI_DEVICE_NONE to the gamepad devices it continues to hold onto block file descriptors, so when SDL uses evdev to grab the device, it's blocked as well. This is addressed in SDL_input_only.patch, after the call to GetInfo.
This was absolutely infuriating, and took a good bit of GDB to figure out. The failure mode is that a button will behave as though it is being held down, often after advancing a menu, so depending on the next focused item on each screen you may be in for a fun guided tour through the UI. The offender this time was the SDL joystick class. As it turns out, evdev drivers can miss an event. I get a sense that it happens when the system is taxed, so the situation is exacerbated on RPi, but certainly not unique to it. When an event is missed evdev transmits a SYN_DROPPED event, at which point it can be polled to correct internal buffers. Unfortunately there is no concept of SYN_DROPPED as of SDL 1.2.15. Fortunately a contributor named Simon has proposed a patch, which was merged in last month, and addresses this issue with regard to axes, but not buttons. I modified it to poll the button states and merged those changes back into the 1.2.15 joystick class with this patch.
Originally I was going to fix these issues by using the js* devices in SDL and applying calibrations with jscal (I added linuxconsole package to my build in order to support it), but I really wanted the D-Pad to be supported properly as a HAT input, which is unique to evdev. As a result, I made some changes to the initialization numbers in gamecon. The problems are these:
1. Analog trigger axes come to rest at the low end of their value range. As a result XBMC thinks that the triggers are always being pulled negative. Creating a unattainable "false bottom" for analog triggers equidistant from the resting and max values prevents this.
2. The theoretical range for all Gamecube axes is 0-255. These values are possible, but only when the controllers are taken out of their frames, because the plastic limits their range of motion. The following is a quote from the Linux Kernel Documentation(italics added for emphasis):
input_set_abs_params(button_dev, ABS_X, 0, 255, 4, 8);
This setting would be appropriate for a joystick X axis, with the minimum of 0, maximum of 255 (which the joystick *must* be able to reach, no problem if it sometimes reports more, but it must be able to always reach the min and max values), with noise in the data up to +- 4, and with a center flat position of size 8.
I tested the four controllers I own and unfortunately, there's a good bit of variance between them. The values I ended up with represent worst case ranges (ensuring all the axes of all four gamepads were well within reach of the mins and maxes) and midpoints that represent axes at rest within precision.
Even if these values do not perfectly suit all Gamecube gamepads, they should be an improvement over the unattainable 0-255.
That more-or-less covers it to where I am today. I'm happy to say that XBMC is fully functional, and I'm using it in my bedroom now with no input device other than a Gamecube controller. There are some things I left out that are very specific to my hardware build. I can cover some of those things (joystick module initialization, keybinding xml, etc.) when I can write a proper Quart how-to. In the meantime, I need to try and get some of these things patched in officially and make this easier to replicate.
Dism: How did I miss this?
Not-so-recently I dispensed with using optical installation media for pretty much everything. This of course includes Windows operating systems so I always have a 4GB flash drive on hand with whatever version of Windows I'm currently running. This is not always a happy-path sort of operation and today I found myself exasperated trying to install Hyper-V as "Add Windows Features" chugged along in vain doing God-knows-what as I waited impatiently. My expectation was that it would recognize my flash drive and that would be the end of it, but it was not to be. A quick web search yielded an answer more in the form of fishing lesson, than fish (much thanks to Andre Ziegler). Open an elevated command prompt and use the Deployment Image Servicing and Management tool (DISM) with the proper arguments and voila.
C:\WINDOWS\system32>Dism /online /enable-feature /all /featurename:Microsoft-Hyper-V /Source:h:\sources\sxs /LimitAccess
Deployment Image Servicing and Management tool

Version: 6.2.9200.16384
Image Version: 6.2.9200.16384
Enabling feature(s)

[==========================100.0%==========================]

The operation completed successfully.

Restart Windows to complete this operation.

Do you want to restart the computer now? (Y/N)
Source
As requested, I have opened the full source for TranscodeToMP4. You can find it in my Blog repository on GitHub.
Transcode to MP4
A few weeks ago, I talked about playing with WPF and DirectShow with WPF MediaKit. I wanted to finish a video transcoder project I had laying around for some time. Originally, it was a very simple WinForms app that guides the process of building a graph in DirectShow to extract the audio and video streams from some video file source, send them through some other compressor (or not), and place them in an MP4 container. The goal was to allow my wife to convert the files from her camera, so she could post them on YouTube (She didn't want to use GraphEdit, imagine that). At the time, HandBrake didn't exist, or wasn't available on Windows and there were plenty of paid options, but I figured I could mock up a solution at a similar cost. That was true, until I moved it to WPF and added a video preview, but whatever, it was fun. This is the result:![]()
Transcode to MP4 - Version 1.0.0.0
Source
Required:
Haali Media Splitter: Actually, only the MP4 Multiplexer is required, but the splitter is a handy file source, supporting many formats.
Recomended:
FFDShow Tryouts: This adds a ton of functionality and customization, through the filter settings dialogs. See Issues and Solutions below.
MONOGRAM AAC Encoder: This is my own build of this filter. I found this and a number of other GPL and LGPL based DirectShow filters at RadScorpion's blog. I wanted to use this filter, but it doesn't register as an Audio Compressor in DirectShow, which this Transcoder requires. If you would like the source for my changes, please don't hesitate to ask.
There are a number of other filter options you can experiment with, and of course your mileage may vary. Also, this program will attempt to allow you to make any decision you want about what codecs you would like to use. That doesn't mean that the MP4 Multiplexer or your video player of choice will appreciate the decision you made, and this program does not protect you from this.
Options:
The Show Preview option can be found in the render options menu. Some filters don't work so nicely with the Pin Tee Filter, which is used to show a video preview during the encoding process. Turning off the Show Preview option lets this program build a graph without including the Pin Tee and Video Renderer. Media Center filters will require the Show Preview setting to be off.
The Use Clock option is the same as the one found in GraphEdit. It will generally allow the graph to progress at or below the speed of playback. You should always try leaving this option off for the sake of speed, but some filters don't appreciate being rushed.
Clicking on the gear icon next to the selected decoder filter will pop the filter's configuration dialog (if it has one). These are implemented by the filter's vendor.
Issues and Solutions:
I found out while testing this with the filters Media Center uses with WTV and DVR-MS files that some files aren't so happy working outside the bounds of their original intent. I did have success transcoding these formats, however, by turning off the Show Preview option.
In testing with FFDShow Tryouts, files with MPEG audio streams tended to halt or crash the program. This was corrected by going into the FFDShow Audio Decoder Configuration in the start menu, and under Codecs, I switched the MP1,MP2 decoder from libmad to libavcodec.
Why not just use HandBrake now?
By all means, you should if it suits your needs. HandBrake offers tons of options, is relatively user friendly and doesn't require all this mucking about with DirectShow filters. If it were out when I wrote the first pass of this, I would have had no motivation to write it. However this is an extremely open-ended tool, so if you need to transcode something that handbrake doesn't support, but for which there are DirectShow filters available, you can use this as an alternative to GraphEdit. Media Center files are a good example of this.
Please leave me a feedback if you are experiencing issues using this tool, you have feature requests, or other questions.
DirectShow with WPF MediaKit
Lately, I have been tweaking and old video file transcoding application, so I can post it here. I'll get into the program itself in more detail once I'm done adding some functionality.
For those of us who still have some unfinished business in the world of DirectShow, as well as those building new software with Media Foundation, Jeremiah Morrill's work with the WPF MediaKit can be a helpful tool. The intent of this library seems to be to provide pluggable media presenters for a number of use cases like DVD content, generic URI content, video capture devices, Direct3d renders, etc. If these cases fit your needs, dropping the appropriate element into your XAML will be a negligible task. In my case, the bulk of the graph is built in code that isn't concerned with the UI, and all I needed was a surface allocated renderer to plug into my existing pipeline architecture. Once I found the right way to use the aspects of the Media Kit that I needed, the code to expose them was simple.
The first thing I had to understand was that Jeremiah's player classes inherited from a WorkDispatcherObject that encapsulated his own WorkDispatcher class, which handles delegate queuing and invoking and hosts a message pump. It's a nice implementation, so I had no problem incorporating it into my model code, which handles the pipeline's topology. Allowing two WorkDispatcherObjects to share a dispatcher required a small modification to the kit: The Dispatcher property on WorkDispatcherObject needed to be made protected, rather than private. Changing the dispatcher of a WorkDispatcherObject that has already started its dispatcher's thread can have some unintended results. It wouldn't be too tough to write a WorkDispatcherObject that could support setting the dispatcher more gracefully, but this works for me as long as I'm careful about when I set it. Since the player object is instantiated as a result of UI initialization and immediately starts a thread on the dispatcher, it was much simpler to allow the ViewModel code to borrow the View's dispatcher, using a OneWayToSource binding.
<Local:GraphPlayerElement GraphPlayer="{Binding GraphPlayer, Mode=OneWayToSource}"/>
The entire player is bound, rather than just the WorkDispatcher, because the ViewModel/Model will need it to call CreateRenderer. Here is the code for the player and the element used to host it:
public class GraphPlayerElement : MediaElementBase

	protected override WPFMediaKit.DirectShow.MediaPlayers.MediaPlayerBase OnRequestMediaPlayer()
	{
		return new GraphPlayer();
	}

	public static readonly DependencyProperty GraphPlayerProperty =
		DependencyProperty.Register("GraphPlayer", typeof(GraphPlayer),
		typeof(GraphPlayerElement), new PropertyMetadata());

	public GraphPlayer GraphPlayer
	{
		get { return (GraphPlayer)GetValue(GraphPlayerProperty); }
		set { SetValue(GraphPlayerProperty, value); }
	}

	protected override void OnInitialized(EventArgs e)
	{
       	base.OnInitialized(e);
		GraphPlayer = (GraphPlayer)MediaPlayerBase;
	}
}

public class GraphPlayer : WPFMediaKit.DirectShow.MediaPlayers.MediaPlayerBase
{
	public GraphPlayer()
	{
		//Using STA, because my application pops property windows.
		EnsureThread(System.Threading.ApartmentState.STA);
	}

	/// <summary>
	/// This method exposes a surface allocated renderer to the caller
	/// </summary>
	public IBaseFilter CreateRenderer(IGraphBuilder graph)
	{
		if (!CheckAccess())
		{
			Dispatcher.BeginInvoke((Action)(()=>CreateRenderer(graph)));
		}

		return CreateVideoRenderer(
			WPFMediaKit.DirectShow.MediaPlayers.VideoRendererType.VideoMixingRenderer9,
			graph);
	}
}
Wake on Lan with IronPython
Since introducing a custom built Media Center PC to my living room configuration back in 2005, the machine filling the role has also become a local storage server of sorts. The music functions and storage requirements alone make it an appealing location for centralized storage. Of course it's not always on, nor would we really want it to be, so we would need an easy way to wake it up from workstations, phones, and laptops on the LAN.
Enter Wake-on-Lan. It wasn't difficult to figure this out. In fact my Xbox, which we were using as an extender in the bedroom, was already using it. With that already working, there was no configuration to be done on the Media Center PC itself (I'll cover it anyway). Writing a WOL.exe to form the "Magic Packet" and send it was easy, setting up shortcuts on my wife's and my own systems with the right command arguments to include the port and the Media Center's MAC address was even easier.
In my last post I discussed Windows scripting, and it seemed like something like this was a good candidate for an example. Plus, back when I wrote that WOL.exe, it seemed a little heavy handed, but I still loved the simplicity of the code itself and wanted to share it.
Set up the Host
As I said, I didn't have to mess with this, but you will need to make sure that your host's network adapter is ready to receive a Wake-on-Lan. Go to device manager, open up your favorite network adapter, and make sure the setting to the right is enabled.
While you're at it, get the MAC address of the adapter. You can do an "ipconfig /all" in the command prompt and it will be listed as "Physical Address". Write this down for later.
Some systems will require that you modify settings in the BIOS to support Wake-on-Lan. I'm not going to cover it, since BIOS menus vary, but this was another thing that I happily didn't need to do.
The Script
Pull out the MAC address you recorded from the host machine and place each hex digit in the byte array, WAKE_MAC_ADDRESS.
import clr
clr.AddReference('System')
clr.AddReference('System.Core')
from System import *
from System.Net.Sockets import *
from System.Net import *
from System.Linq import *

WAKE_MAC_ADDRESS = Array[Byte]([0x0A,0x0D,0x0D,0x04,0x0E,0x55])
PORT = 40000

#fill the first 6 bytes of the packet with 0xFF
magicPacket = Enumerable.Repeat[Byte](0xff, 6);

#repeat the MAC address 16 times
for i in range(16):
magicPacket = Enumerable.Concat(magicPacket, WAKE_MAC_ADDRESS)

#send a UDP boradcast of the magic packet
socket = Socket(AddressFamily.InterNetwork, SocketType.Dgram, ProtocolType.Udp)
broadcastEndpoint = IPEndPoint(IPAddress.Broadcast, PORT)
socket.SetSocketOption(SocketOptionLevel.Socket, SocketOptionName.Broadcast, True)
socket.SendTo(Enumerable.ToArray(magicPacket), broadcastEndpoint)
socket.Close()
Shortcut
 What I did at this point was to make a shortcut called "Wake Emcee" (Emcee being the name of my Media Center PC), and pointed it to ScriptShell using the -a option so it silently executes the script and exits. Shell32.dll has the perfect icon for this. It will be the default location searched, if you click "Change Icon...".
ScriptShell: a Command Line host for Powershell/IronPython
I wanted to write about a tool project as soon as I could, because custom tooling is something that I enjoy doing. Time and my mortgage tend to enforce that these excursions can be completed in a weekend or less, so this is a simple, yet effective solution for my Windows scripting needs.
Design Goals
- Support two popular language options, Powershell and Python.
- Target the 4.0 Framework.
- Tool contains its own references, including scripting runtimes, for optimal redistribution.
- Dynamically reference custom libraries.
Use Cases
- Easily distributed unit/integration/regression testing of .NET libraries
- Generalized .NET 4.0 platform automation, who needs batch files?
- Can be set as the default binding for PS1 and PY files, or maintain your Powershell/ipy bindings and use GRIFFPS and GRIFFPY extensions.
Download ScriptShell 1.0.0.0
Source
Usage
Usage: ScriptShell [script-file-list] [-r reference-directory-list]
                   [-d scripts-directory-list] [-a]

Options:
 script-file-list              Run the specified script file(s) .
 -r reference-directory-list   Look for reference assemblies in this/these
                               location(s).
 -d scripts-directory-list     Run scripts from the specified
                               directory/directories.
 -a                            Automated mode.  This option will not prompt
                               for advancement.
                               Note: Console prompts written into script
                               files will be unaffected.

 When specifying script files with the -s and -d options, the specified
 script files or runnable directory contents must be named with the
 following extensions:
                               *.py or *.griffpy for IronPython scripts
                               *.ps1 or *.griffps for PowerShell scripts";
Motivation
I wrote the first iteration of this tool out of frustration. My client was experiencing issues regarding connection stability with a back-end service. Reproducing the issue was problematic, and results varied by machine and locale. It occurred to me that it might be nice to simplify his testing environment, and that of his support staff by giving him something without a UI, that would call directly into my Model code and would always act in a consistent, predictable way, regardless of who ran it. Something similar to a unit/integration test platform might be nice, except the software requirements would be unwieldy. A Powershell script seemed like a perfect option, until I realized it singularly targeted the 2.0 framework. There were a few documented workarounds for this, but it was pretty apparent by now that I'd save time by writing up a Command Line Powershell host, targeting the 4.0 Framework, with references to my Model code.
Hosting Powershell
This was a relatively easy task, and is primarily just the tedium of tying all of the Powershell hooks to the command line. This post by Mitch Denney was particularly helpful as a starting point. Since my PSHost would need a UI, I needed to inherit PSHostUserInterface as well. This is where the hooks are set into the command line.
public class ConsolePsHostUserInterface : PSHostUserInterface
{
	//other tedium

	//wire to Console
	public override string ReadLine()
	{
		return Console.ReadLine();
	}

	public override System.Security.SecureString ReadLineAsSecureString()
	{
		SecureString secret = new SecureString();
		ConsoleKeyInfo currentKey;
		while ((currentKey=Console.ReadKey(true)).Key != ConsoleKey.Enter)
		{
			if (currentKey.Key == ConsoleKey.Backspace)
			{
				if (secret.Length > 0)
				{
					secret.RemoveAt(secret.Length - 1);
					Console.Write(currentKey.KeyChar);
				}
			}
			else
			{
				secret.AppendChar(currentKey.KeyChar);
				Console.Write("*");
			}
		}
		Console.WriteLine();
		secret.MakeReadOnly();
		return secret;
	}

	public override void Write(string value)
	{
		Console.Write(value);
	}
}

public class ConsolePSHost : PSHost
{
	//more boringness

	//insert my console UI
	private PSHostUserInterface _ui = new ConsolePsHostUserInterface();
	public override PSHostUserInterface UI
	{
		get { return _ui; }
	}
}
All that's left to do is to add a lazily-instantiated property for the Powershell environment, console exception handling and a nice calling convention for my application code.
public static class PowerShellRunner
{
	private static PowerShell _pws = null;
	private static PowerShell PowerShell
	{
		get
		{
			if (_pws == null)
			{
				_pws = PowerShell.Create();
                    		ConsolePSHost host = new ConsolePSHost();
                    		_pws.Runspace = RunspaceFactory.CreateRunspace(host);
                    		_pws.Runspace.Open();
			}
			return _pws;
		}
	}

	public static void Run(string file)
	{
		PowerShell.AddScript(File.ReadAllText(file));
		PowerShell.AddCommand("Out-Default");
		try { PowerShell.Invoke(); }
		catch (Exception e)
		{
			Console.Write(e.ToString());
			Console.WriteLine();
		}
	}
}
So I called into something similar to this from a command line application that searches a known subdirectory of the current location for Powershell scripts and it worked like a charm. It's about now that I realize how much I don't like calling into .NET assemblies with Powershell. Cmdlets are a nice shorthand for common operations, but who can remember all of them? Here's a line of script I wrote to expand a log path with an environment variable:
$logName = [System.Environment]::ExpandEnvironmentVariables("%USERPROFILE%\ScriptShell\Test1.log")
I forget how to use that crazy bracket-and-double-colon syntax every time, and I end up having to Google it or look it up in another script. Still, this accomplished what I set out to do, and I know there are plenty of Powershell lovers out there.
Hosting IronPython
It dawned on me later that not only is it easier to host the Dynamic Language Runtime, but my personal preference swings toward writing a script using Python's syntax. Here's an example of the same action as above, written in Python:
logName = Environment.ExpandEnvironmentVariables("%USERPROFILE%\ScriptShell\Test1.log")
Here's what it took to get IronPython support:
public static class PythonRunner
{
	private static ScriptEngine _engine = null;
	private static ScriptEngine ScriptEngine
	{
		get
		{
			if (_engine == null)
			{
				_engine = IronPython.Hosting.Python.CreateEngine();
				_engine.Runtime.IO.SetOutput(Console.OpenStandardOutput(), Console.Out);
				_engine.Runtime.IO.SetErrorOutput(Console.OpenStandardOutput(), Console.Out);
			}
			return _engine;
		}
	}

	public static void Run(string file)
	{
		try { ScriptEngine.CreateScriptSourceFromFile(file).Execute(); }
		catch (Exception e)
		{
			Console.Write(e.ToString());
			Console.WriteLine();
		}
	}
}
...easy as a cliche. Of course, in a sense, what I have done is rewritten ipy.exe, without the interactive mode (this might be a good follow-up), but in the fist pass, the easiest way to distribute this functionality was to directly reference my Model code and pass this out as an EXE to be dropped into the install directory of my client's software. This implementation is a generalized implementation of the same concept, where any reference needed by a script is satisfied dynamically with a command line option at run-time. Developers who do not need to redistribute their scripting environment may find that ipy.exe works just fine for them, the Python scripts will look the same in either case.
I had one major hiccup with using the IronPython Runtime for this tool, and it came when I attempted to pull the application out of my Release directory and only use the references I had embedded as resources. The issue and workaround are adequately described here. The workaround involves a modification, and custom build of the runtime. Thanks to rodrigobarnes for that.
Download ScriptShell 1.0.0.0
Source
SecureString: Soup to Nuts, Part II
My last post, SecureString: Soup to Nuts, Part I, dealt with some basic rules around using the SecureString class in .NET and how to prepare the secret stored inside for persistence, without exposing the clear text to a CLR type. In the second part, I'm going to discuss my solution for maintaining SecureString best practices, without sacrificing our MVVM design principles. The XAML and code provided is in WPF, but it's applicable to Silverlight, as well with minimal tinkering.
First let's talk about PasswordBox. The PasswordBox was designed to obscure the user-entered text, both visually and in memory. That is to say, visually, it's much like the old Windows Forms MaskedTextBox, except it's specifically designed for secret data, and will only expose said secret in a clear text string if asked to do so,via the Password property. It's important to understand that the Password property is only a helper that accesses the encrypted data member. For this reason, it is not exposed as a DependencyProperty. This is a source of frustration to developers who have no designs on a SecureString solution. Alas, there's no pleasing everyone, and a Password DependencyProperty would make an acceptable SecureString implementation impossible with PasswordBox. If you Google "PasswordBox MVVM" (without the quotes) you will find that the generally accepted solution for the CLR string camp, makes use of an attached property to expose a CLR string for binding. This effectively takes the MaskedTextBox functionality of PasswordBox, and passes on memory security.
We want an MVVM solution that hands us a SecureString, so let's look at the SecurePassword property. More frustration, as this is also not a DependencyProperty. Before you go angrily writing an attached property to expose the SecureString, understand that this is by design, not neglect. The first commandment of SecureString is to dispose of it when you're finished right? The SecurePassword property gives us a SecureString to use one time, then dispose of it.
The MVVM way to do this is now staring us in the face. We need to bind the event we're going to use to execute our users' credentials to an ICommand.
<PasswordBox x:Name="_passwordBox" ...>
        …
        <PasswordBox.InputBindings>
                <KeyBinding Key="Enter" Command="{Binding ExecuteCredentialsCommand}"
                                 CommandParameter="{Binding ElementName=_passwordBox}" />
            </PasswordBox.InputBindings>
</PasswordBox>
<Button Content="Login Button Text" …
        Command="{Binding ExecuteCredentialsCommand}"
        CommandParameter="{Binding ElementName=_passwordBox}"/>
In this example's ViewModel, I'm using Prism's DelegateCommand implementation of ICommand.
public ViewModelClassConstuctor(IRegionManager regionManager,
	IProxyDataProvider dataProvider)
{
	ExecuteCredentialsCommand = new DelegateCommand(
	//execute method
	delegate(object parameter)
	{
		SecureString securePassword = parameter as SecureString;
		if (parameter is PasswordBox)
			securePassword = ((PasswordBox)parameter).SecurePassword;
		try
		{
			//authentication/persistence model code
		}
		finally
		{
                    		securePassword.Dispose();
		}

                },
	//can execute method
	delegate(object parameter)
            {
		SecureString securePassword = parameter as SecureString;
		if (parameter is PasswordBox)
                        	securePassword = ((PasswordBox)parameter).SecurePassword;
		return securePassword != null && securePassword.Length > 0 &&
			!string.IsNullOrEmpty(UserName);
	});
	CredentialsChangedCommand = new DelegateCommand(
	delegate
	{
		ExecuteCredentialsCommand.RaiseCanExecuteChanged();
	});
}

public DelegateCommand ExecuteCredentialsCommand { get; private set; }
public DelegateCommand CredentialsChangedCommand { get; private set; }
There you have it. With the code from the previous entry, you can generate a nice authentication prompt with password persistence, without sacrificing memory security or your MVVM design. I hope this has been a helpful guide. Please leave a comment if you liked it, have something you'd like to share, or if you thought it could have been more comprehensive.
SecureString: Soup to Nuts, Part I
Motivation:
Using the SecureString class in .NET is a great way to protect your users' sensitive data from malicious code, intended to pull said data right out of memory. It is already supported by framework classes that Internet enabled applications use often, like NetworkCredential, making its addition to your existing code fairly straightforward.
That's great, but since nothing is ever easy I want to point out that there are two scenarios where it wasn't so easy to accomplish requested functionality and maintain the proper use of SecureString:
- implementing secure local storage of a password, and
- preserving MVVM design without exposing the password in an insecure managed object.
There is quite a bit of widely accepted advice to be found on community support forums that seeks to fit each of these scenarios, but defeats the point of using SecureString at all.
As I understand it, there are two commandments one should follow if one intends to use them without sabotaging one's own efforts. The first is to dispose of the SecureString when processing is complete, the other is never to allow the unprotected contents of the SecureString to find its way into a CLR object, like a string or byte array. It just isn't clear how long they will be hanging around in memory, and heck, if you wanted to store your secret in a CLR string, you could have saved yourself a lot of time by doing so to begin with.
In part I and II of this article I will address my method of implementing solutions for these two scenarios, respectively.
Secure Local Storage:
Finally getting to the point. This guy is first, because it's useful regardless of what design patterns or frameworks you're using to implement your interface, or whether you're implementing a GUI at all. If you've ever written a program that needs to utilize local storage for any data placed in a SecureString, you've run into this problem. The last thing you want to do is store it out in clear text, so you know it needs to be encrypted. DPAPI to the rescue. Great, but there's good news and bad news.
First the bad. The ProtectedData's Protect/Unprotect methods are staring us in the face, just begging us to use them, with their single parameter overloads, and be done. Alas, the second commandment of SecureStrings prevents us from placing our secret in a CLR byte array, so we're going to have to make the unmanaged calls to CryptoAPI.
The good news is that we can use P/Invokes and marshaling to accomplish the necessary unmanaged calls to CryptProtectData and CryptUnprotectData, zero out and free any sensitive data immediately without actually writing any unmanaged code.
Now for some code. Moving from an existing SecureString instance into some processing code is always going to look pretty similar to this...
IntPtr unmanagedString = Marshal.SecureStringToBSTR(self);
try
{
//Processing code here. Resist the urge to Marshal.PtrToStringBSTR.
}
finally
{
Marshal.ZeroFreeBSTR(unmanagedString); //free the buffer holding our secret
}
The rest of the solution is pretty plug-and-chug. I wrapped the CryptoAPI calls in SecureString extension methods GetProtectedData and AppendProtectedData found in this file. In the interest of leaving the method of storage as an implementation detail, the extension methods above export and import a byte array (encrypted of course). It's simple to place them in user.config, for example by using the *.settings file designer to make a user setting called “Password” and doing the following in code...
Properties.Settings.Default.Password = Convert.ToBase64String(securePassword.GetProtectedData());
...and to reverse it...
string encPassword = Properties.Settings.Default.Password;
if (!string.IsNullOrEmpty(encPassword))
{
SecureString passwordString = new SecureString();
passwordString.AppendProtectedData(Convert.FromBase64String(encPassword));
}
Thanks to pinvoke.net for P/Invoke signatures.